

Transforming your living space doesn’t require a massive remodeling budget or professional contractors. A DIY fluted wood wall feature introduces tactile dimension, acoustic warmth, and undeniable high-end architectural presence to any plain drywall surface. By leveraging budget-friendly materials like MDF slats, pine boards, or tambour panels, you can completely redefine the focal point of your home.
In this curated guide, explore 25 distinct interior architecture concepts ranging from clever spatial layouts and built-ins to rich material pairings, architectural lighting, hero furniture, and expert styling touches tailored specifically for warm honey-oak and walnut color palettes.
Float an asymmetric walnut media console against a vertical honey-oak slat wall to anchor the living room layout
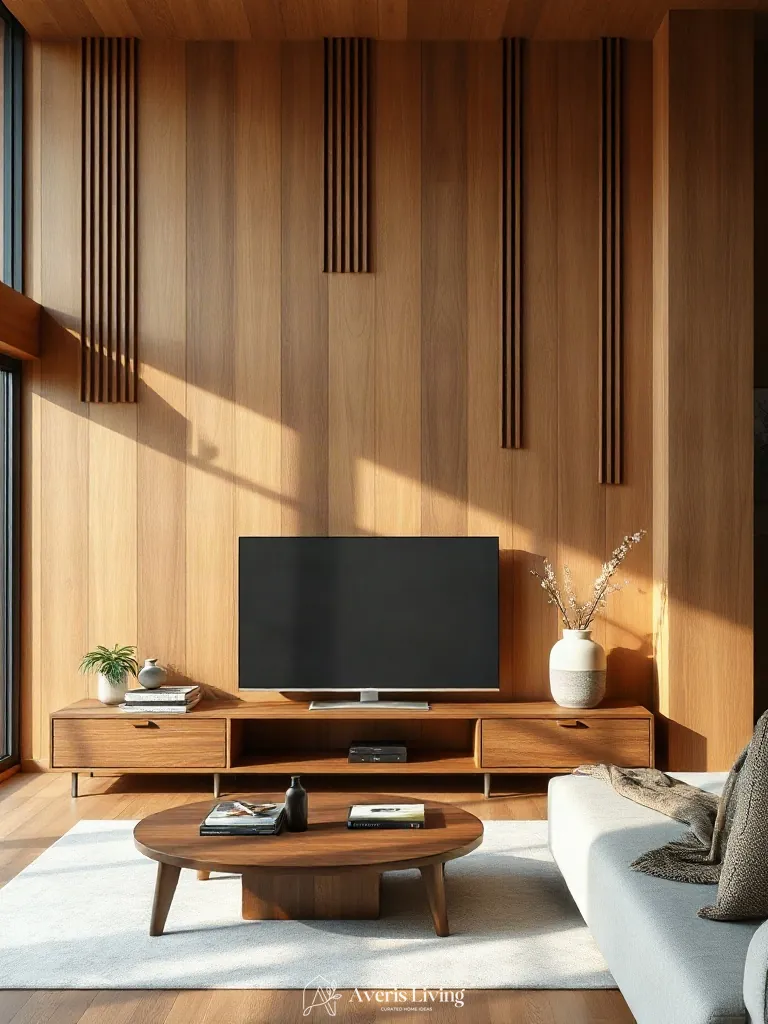
Float a rich walnut media console asymmetrically against a vertical honey-oak slat wall to establish an instant spatial anchor in your living room layout. Off-centering the 72-inch unit creates dynamic visual balance while maintaining clear 36-inch pathways for optimal traffic flow. This deliberate asymmetry opens up diagonal sightlines across the floor plan, preventing heavy media furniture from feeling visually blocked or claustrophobic in tighter spaces.
Position the console sixteen inches off the room’s central axis, allowing the surrounding diy fluted wood wall feature to absorb the heavy visual weight. Layer a low-pile 8×10 wool rug beneath the console, extending it twelve inches past the outer edges to ground the floating arrangement. Maintain at least eighteen inches of clearance between the console front and any coffee table to preserve ergonomic movement.
Zone the reading nook by framing a corner with vertical pine fluted panels and a boucle reading chair
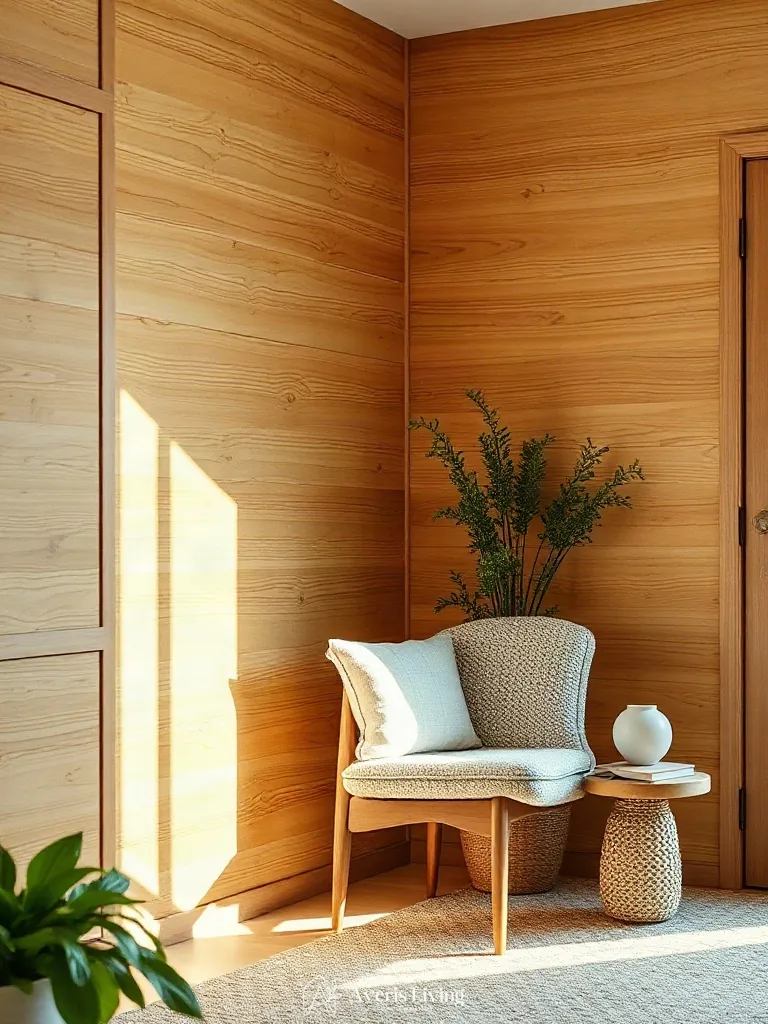
Zoning a dedicated reading nook within an open-concept living room requires deliberate spatial arrangement. By framing a neglected corner with vertical pine fluted panels, you create an intimate micro-architectural boundary. Introduce a plush boucle reading chair alongside a low-profile boucle bench to cleanly separate this secluded retreat from the main conversation pit while maintaining seamless traffic flow and balanced sightlines across the space.
Position your seating to maintain a minimum thirty-inch clearance perimeter for comfortable movement. Anchor both the armchair and the bench on a five-by-eight-foot wool rug, ensuring the front legs of the chair rest securely on the textile to unify the zone. Install the diy fluted wood wall feature directly behind the chair to visually expand the vertical dimensions of the corner.
Anchor the furniture-free corner using a tall fiddle-leaf fig against a budget-friendly half-height slatted wainscoting
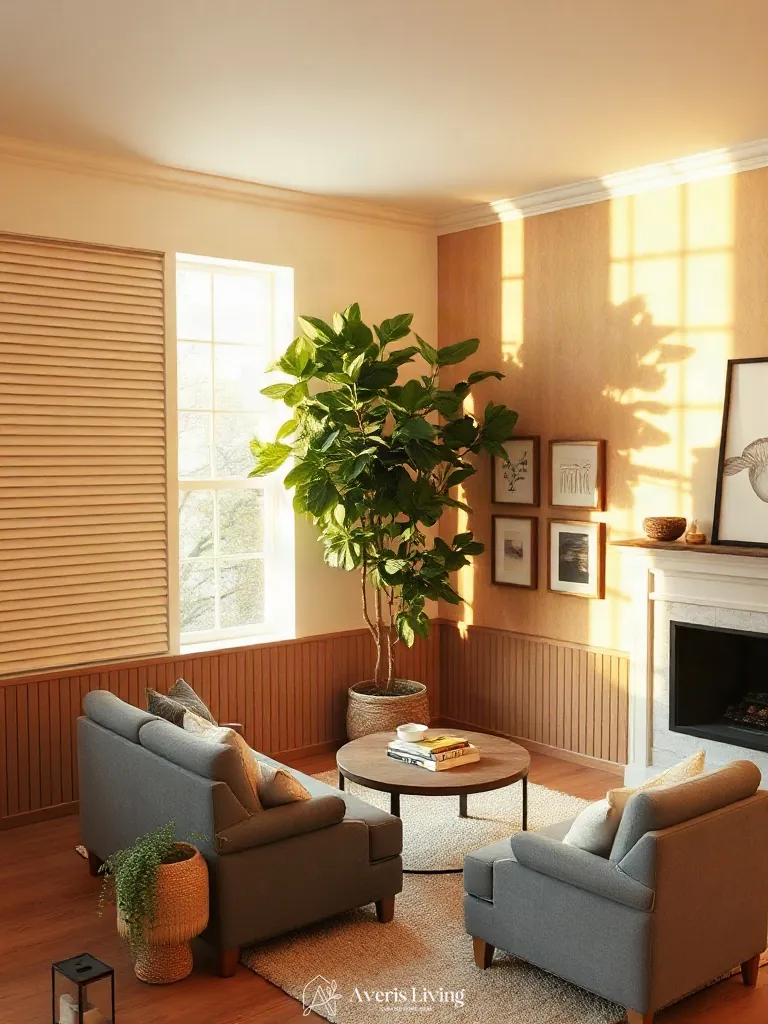
Awkward living room corners disrupt spatial flow and visual balance. By anchoring a previously furniture-free corner with a six-foot fiddle-leaf fig against a half-height painted MDF wainscoting, you establish vertical volume. This layout strategy preserves essential traffic clearances while drawing the eye upward, complementing any adjacent diy fluted wood wall feature without overcrowding the perimeter.
Position the potted plant precisely twelve inches from the intersecting drywall planes to maintain clear sightlines from the primary seating zone. Layer a circular jute area rug beneath the heavy ceramic planter to ground the organic shape and soften the hard corner angles.
Frame the main conversation pit with an offset DIY tambour door accent wall that draws sightlines outward
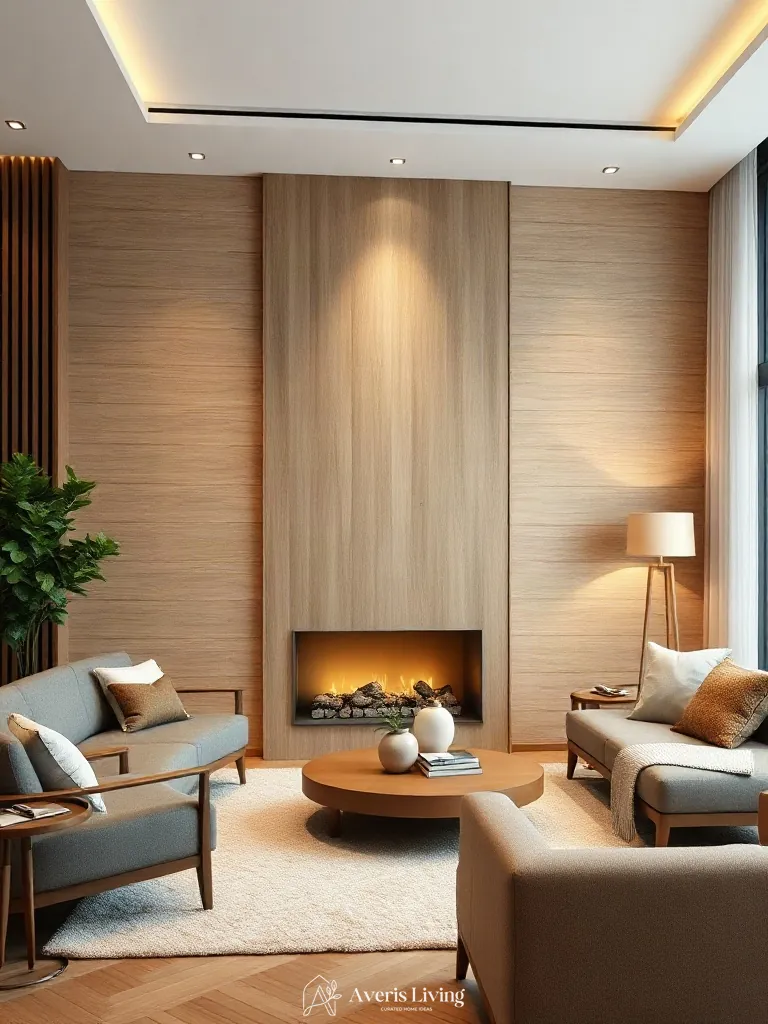
Shifting your conversation pit layout off-center opens dramatic sightlines across the living room. Float a low-profile velvet sectional three feet away from the perimeter, leaving a generous four-foot traffic path behind it. Pair this asymmetrical arrangement with an offset diy fluted wood wall feature finished in matte black oak. This spatial balance draws the eye horizontally, anchoring the seating zone without crowding the primary architectural pathways.
Maintain an intentional negative space buffer by pulling your main sofa at least eighteen inches clear of the vertical tambour panels. Position a circular brass coffee table dead center within the floating furniture cluster to preserve optimal thirty-inch leg clearance.
Build a custom fluted plaster wall panel framing an arched drywall alcove in the living room
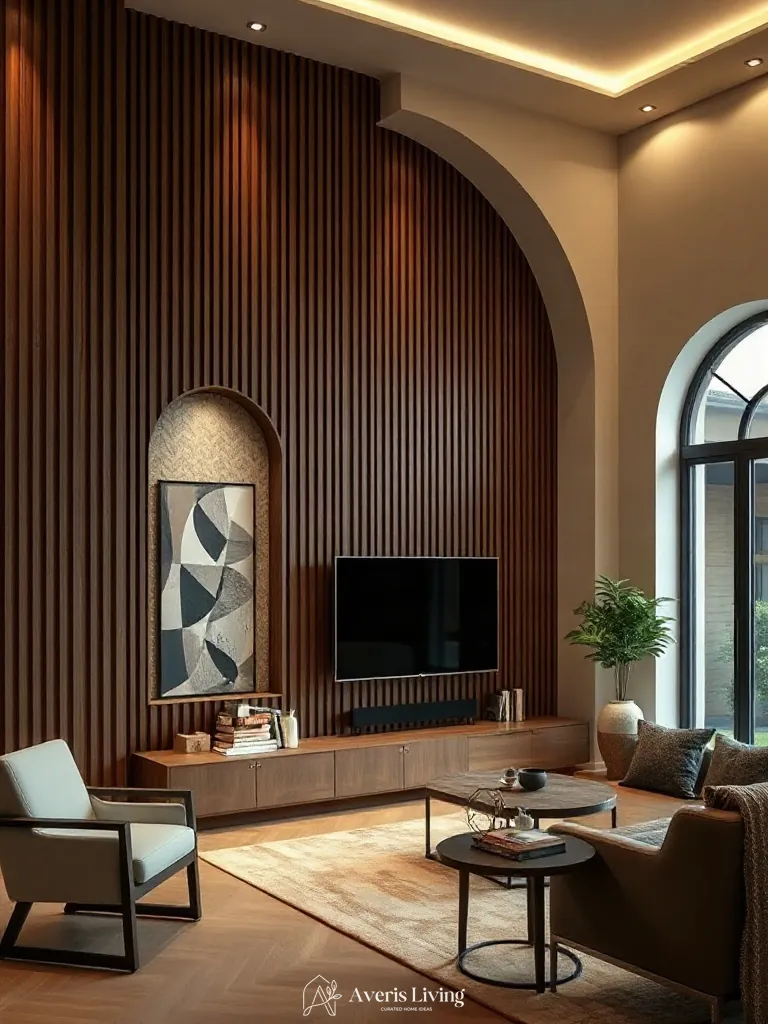
Marrying tactile plaster with structured woodwork creates an elite architectural moment in a modern living room. By framing a smooth, radius-top drywall alcove with custom fluted plaster panels, you introduce soft geometry that contrasts sharply with standard square drywall. Using a 3/4-inch MDF substrate coated in Venetian lime plaster achieves a high-end, monolithic finish that elevates the space.
Begin by cutting a 48-by-96-inch MDF backer to anchor your diy fluted wood wall feature framework. Construct the arched alcove opening using flexible quarter-inch drywall, applying joint compound smoothly over the curve. Secure the vertical plaster-cast fluting profiles directly to the perimeter studs using construction adhesive and finish nails before applying two coats of matte sealer.
Construct a ceiling coffer detail with inset picture-frame molding and oak slat inserts to visually raise ceiling height
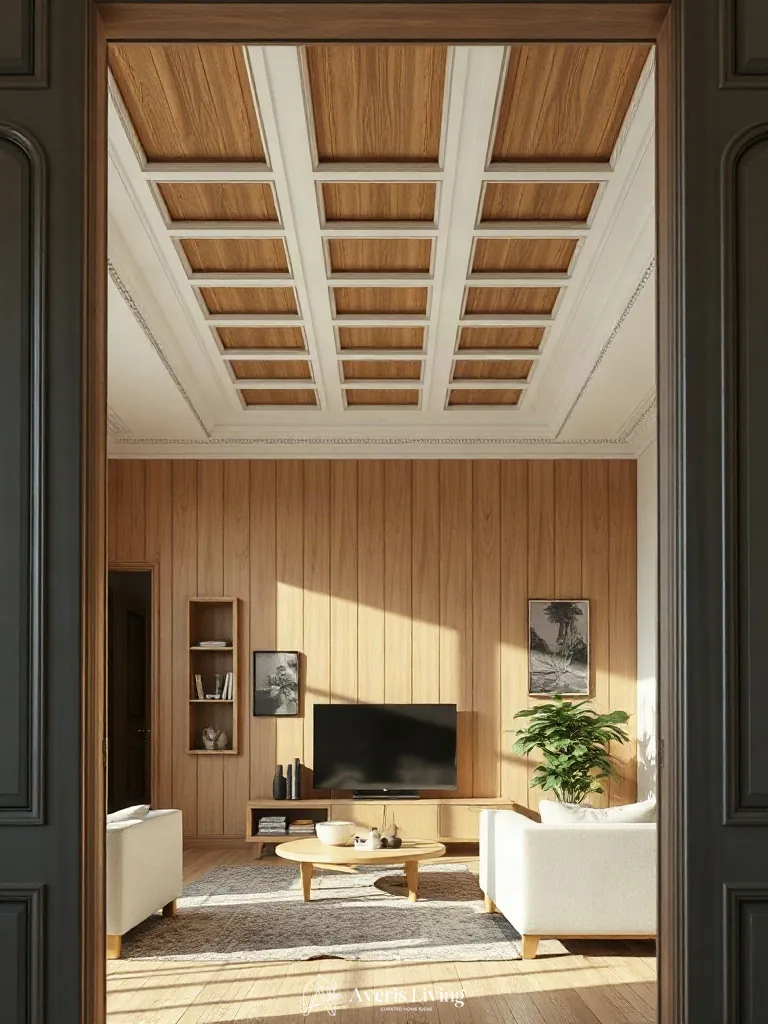
Integrating a coffered ceiling with inset picture-frame molding and natural oak slats draws the eye upward, dramatically altering the perceived vertical volume of a modern living room. By layering 3/4-inch primed MDF coffers over the drywall grid, you establish architectural depth that catches morning light. This structured framing technique mirrors the rhythmic aesthetic of a diy fluted wood wall feature, expanding the room’s perceived height.
Begin by constructing the outer coffer drop-beams using 1×8 pine boards, projecting 4 inches from the drywall. Secure pre-assembled picture-frame molding inside each recessed grid using finish nails and wood glue. Finally, apply polyurethane-finished white oak slat inserts—spaced at 1/2-inch intervals—directly to the inner ceiling backing using construction adhesive.
Install a built-in window seat featuring integrated cubbies and a slitted walnut backing against the honey-oak floor
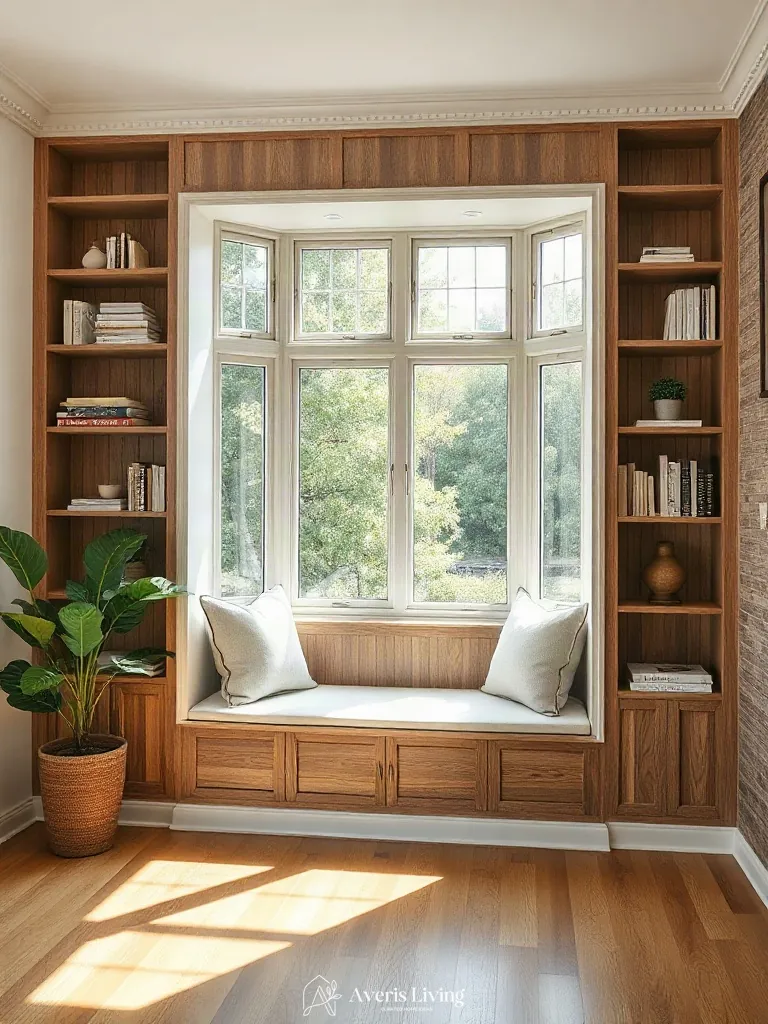
Anchor your living room against honey-oak flooring by framing a deep recessed window with a bespoke architectural bench. Integrating custom joinery featuring a slitted walnut backing and lower cubbies creates sophisticated architectural contrast while offering functional storage. Tucking woven-rattan storage baskets into the 14-inch base compartments introduces organic texture that complements the rich, dark wood grain.
Construct the structural bench frame using 3/4-inch plywood, securing it directly to wall studs for maximum load-bearing stability. Fasten individual solid walnut slats with a 1/2-inch spacing gap along the vertical backing board to achieve a refined aesthetic that mimics a diy fluted wood wall feature without overwhelming the natural light source.
Recess a low-profile media niche into a vertical MDF sluted panel feature wall
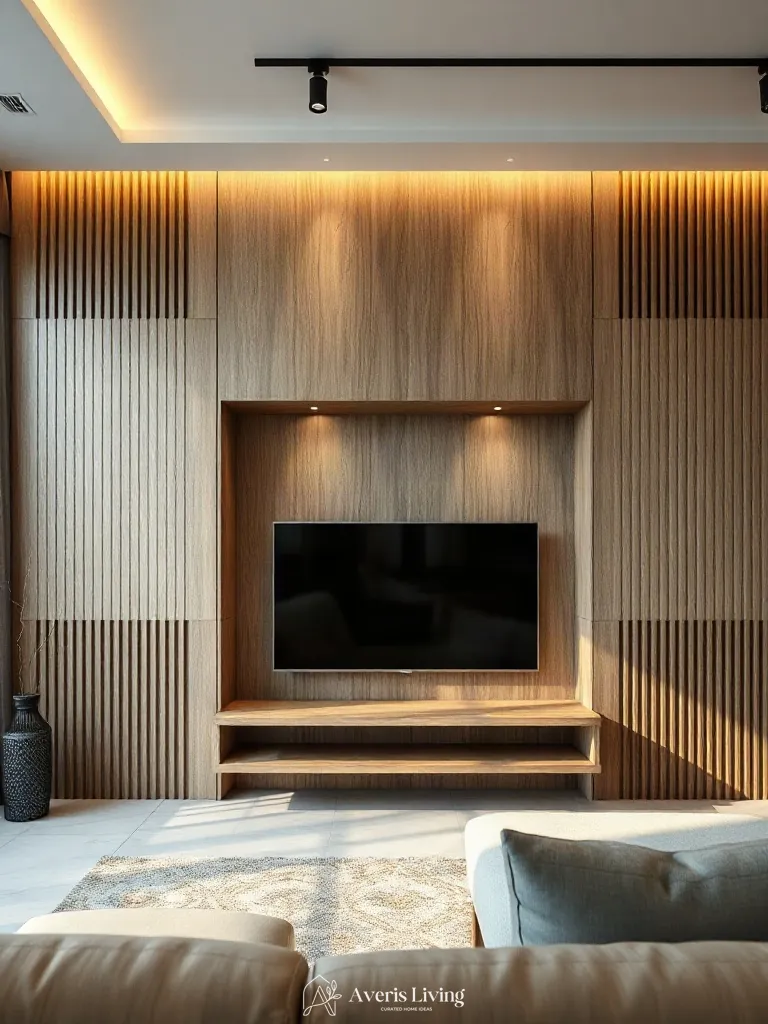
Recessing a low-profile media niche into a vertical MDF slatted panel feature wall brings sophisticated architectural depth to a modern living room. By carving out a 6-inch-deep cavity clad in matte black laminate, the television sits flush, creating a sleek shadow-gap effect that accentuates the surrounding millwork.
To execute this built-in joinery, construct a 2×4 framing skeleton offset from the drywall by 4 inches to accommodate concealed wiring and structural reinforcement. Fasten pre-primed 3/4-inch MDF slats with a 1/2-inch spacing directly to plywood backing using 18-gauge brad nails, finishing with a sprayed satin charcoal lacquer.
Contrast warm honey-oak and walnut acoustic felt wall panels with a single-wall zellige handmade tile fireplace surround
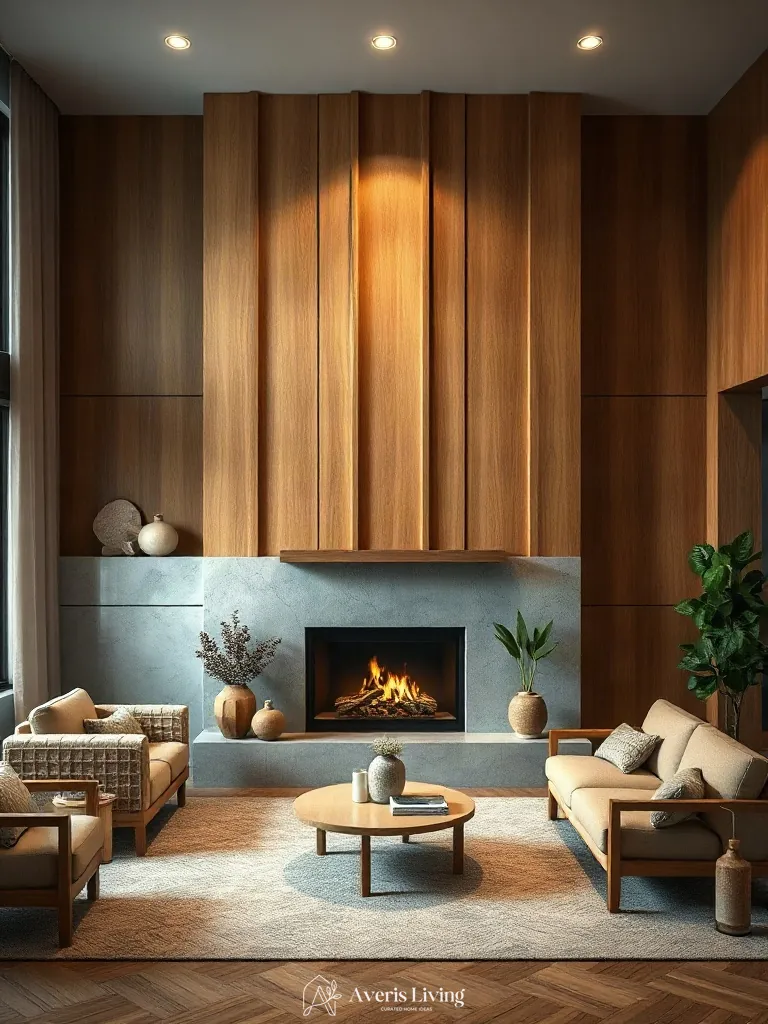
Marrying tactile contrasts defines this modern living room. Warm honey-oak and dark walnut acoustic felt wall panels provide a velvety, light-absorbing textile surface that softens acoustics. Adjacent to this, a single-wall zellige handmade tile fireplace surround introduces irregular, highly reflective ceramic glazes. The undulating, glossy Moroccan clay tiles catch evening lamplight dynamically, creating a striking textural play against the matte, linear rhythm of the wood-slat panels.
To execute this finish juxtaposition, frame your fireplace opening with four-by-four-inch unrectified zellige tiles, leaving tight one-sixteenth-inch grout lines to emphasize their handcrafted edge variations. Apply a high-solvent penetrating sealer to protect the porous clay. Flank the masonry with modular acoustic felt panels backed in rich walnut veneer, securing them directly to drywall using heavy-duty construction adhesive for an integrated, flush finish.
Pair bouclé upholstery on a modern sofa with raw burnished concrete floors and a dark walnut sluted wall backdrop
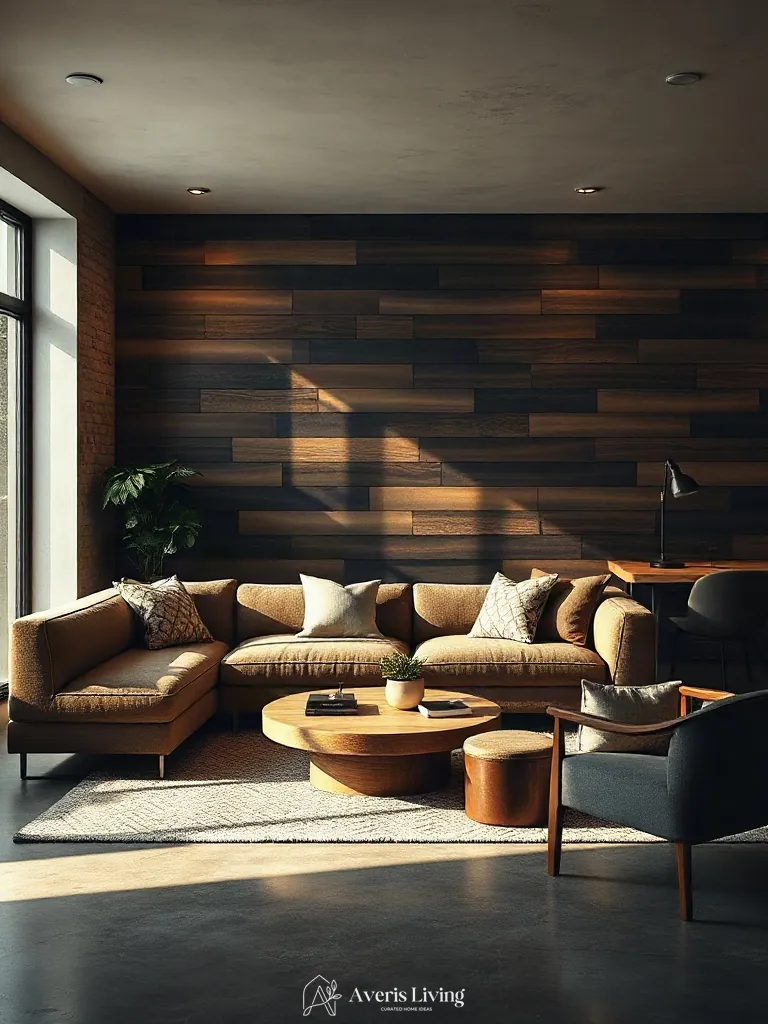
Looping tactile contrast defines this modern living room through heavily textured French bouclé upholstery juxtaposed against industrial raw burnished concrete floors. Grounding the space, a dark walnut sluted wall backdrop introduces deep linear shadows that amplify the organic warmth of the timber grain when hit by angled side lighting.
To execute this finish profile, construct your diy fluted wood wall feature using American black walnut slats finished with a matte polyurethane sealer. Leave a precise 1/4-inch reveal between boards to maximize shadow play against the cool, highly polished sheen of the cured concrete below.
Mount a live-edge walnut slab floating shelf onto blackened-steel hairpin brackets against a DIY pine slat wall
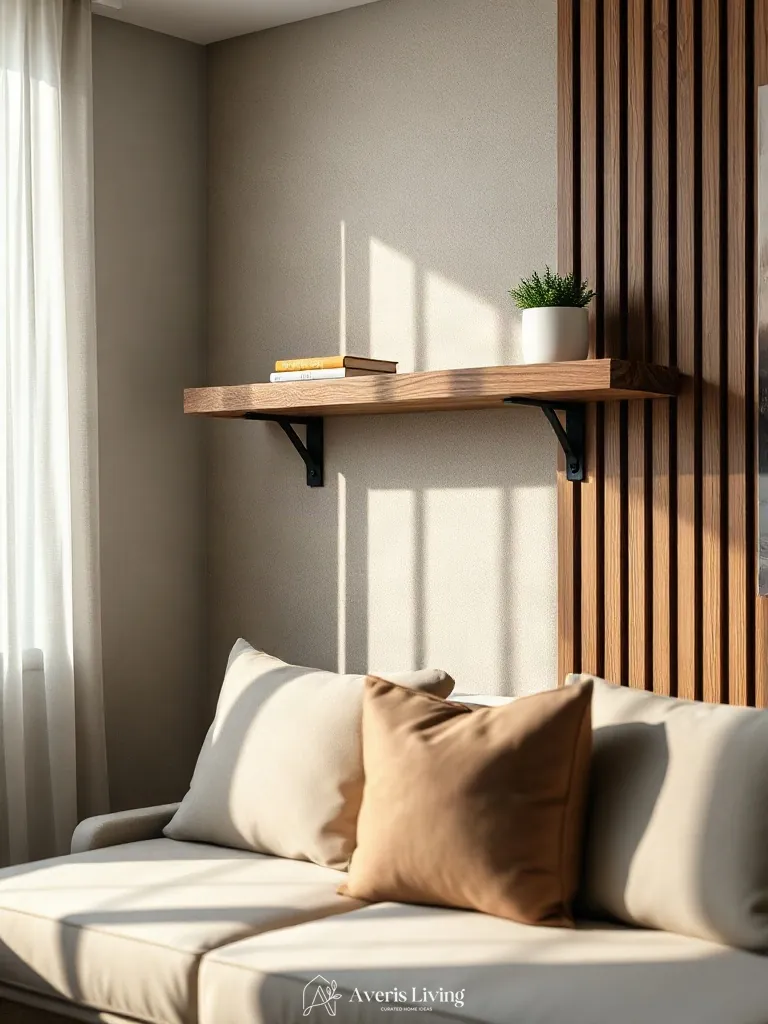
Mounting a live-edge American black walnut slab against a diy fluted wood wall feature creates a stunning textural interplay. The soft, sanded matte finish of the pine slats highlights the organic, undulating sapwood edge of the 2-inch-thick walnut. Morning light catches the subtle tool marks of the raw timber, casting delicate shadows across the vertical channels. This rustic-modern pairing balances smooth machined precision with raw arboreal character, anchoring the living room with rich, earthy warmth.
Secure the slab using heavy-duty, hot-rolled blackened-steel hairpin brackets spaced 24 inches apart to support heavy decor. Fasten the steel directly into structural wall studs using 3-inch timber screws before finishing the surrounding vertical wood elements. Seal the walnut with a hardwax oil to preserve its natural grain without adding an artificial plastic sheen, ensuring a deeply tactile surface.
Apply a rich walnut wood stain to budget MDF fluted panels to mimic expensive architectural millwork
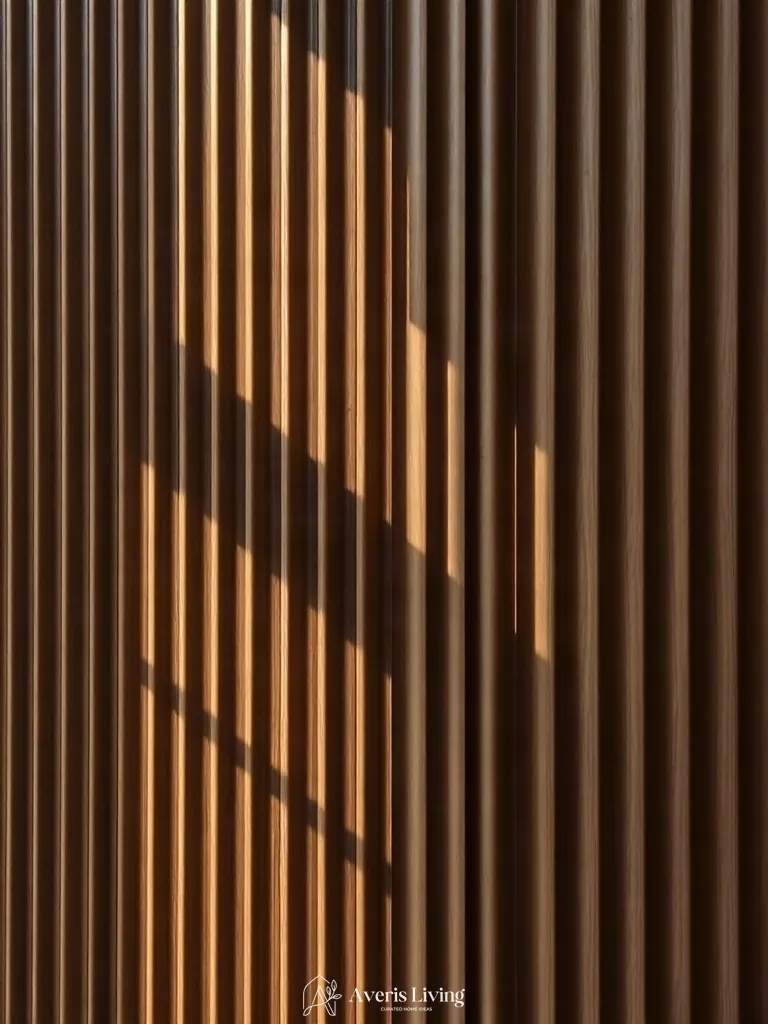
Elevating a living room with a rich walnut wood stain transforms budget-friendly MDF fluted panels into convincing architectural millwork. The dense fiberboard takes a deep, dark oil-based finish uniformly, creating a velvety, light-absorbing surface. When midday direct light strikes the undulating semi-circles, it casts sharp, dramatic shadows that emphasize the tactile grain. This luxurious timber tone anchors the space, beautifully contrasting adjacent handmade zellige tiles in warm honey-oak.
To achieve this finish, lightly sand the raw MDF with 220-grit sandpaper before applying a pre-stain wood conditioner. Brush on the dark walnut gel stain generously, allowing it to penetrate for five minutes before wiping away excess with a lint-free cloth. Seal the vertical ridges with a matte polyurethane spray to preserve the organic, non-reflective tactile quality of the diy fluted wood wall feature.
Glue lightweight polyurethane fluted half-round trim onto drywall using a brad nailer and finish with honey-oak gel stain
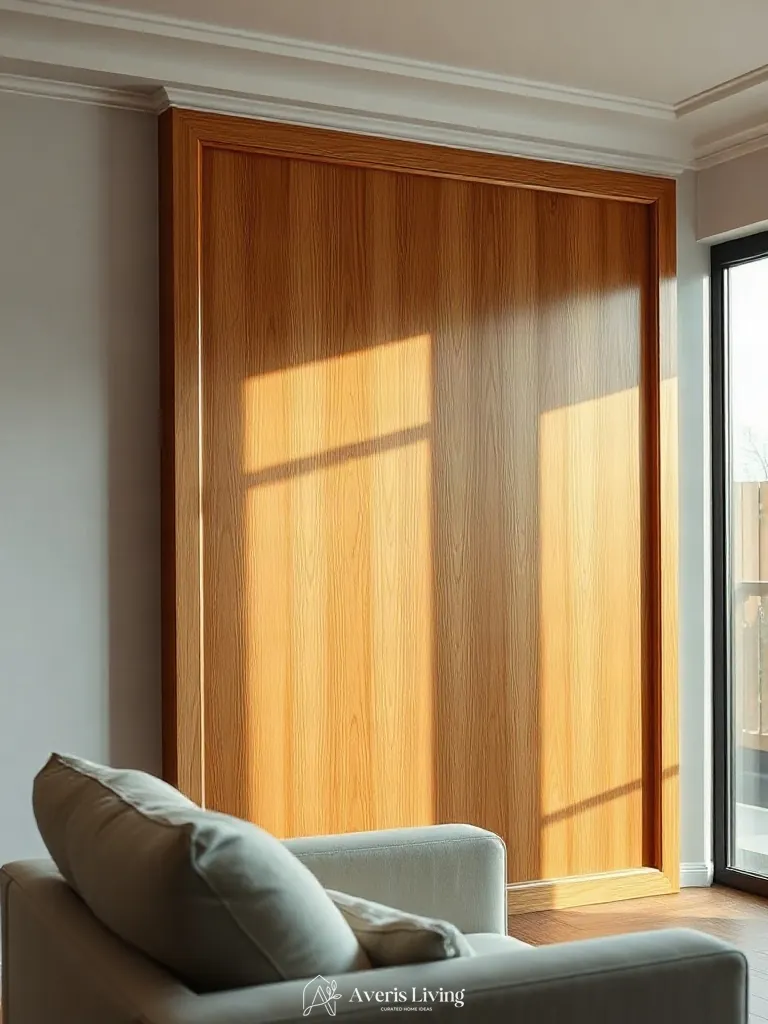
Polyurethane half-round trim brings an exceptionally tactile, ribbed surface to your living room. When hit by golden hour light, the micro-concave channels cast delicate micro-shadows across the wall plane, heightening the organic grain mimicry. Paired against adjacent handmade zellige tile surfaces, the synthetic yet convincing texture introduces a warm honey-oak finish that grounds the modern envelope in rich dimensionality.
Secure the lightweight polyurethane mouldings directly to drywall utilizing a pneumatic brad nailer set to eighty psi. Apply a pigment-rich honey-oak gel stain evenly with a lint-free cotton cloth to seal the dimensional ridges before wiping away excess residue for a satin sheen.
Mount articulated brass wall sconces at 60-inch height flanking the honey-oak fluted living room focal wall
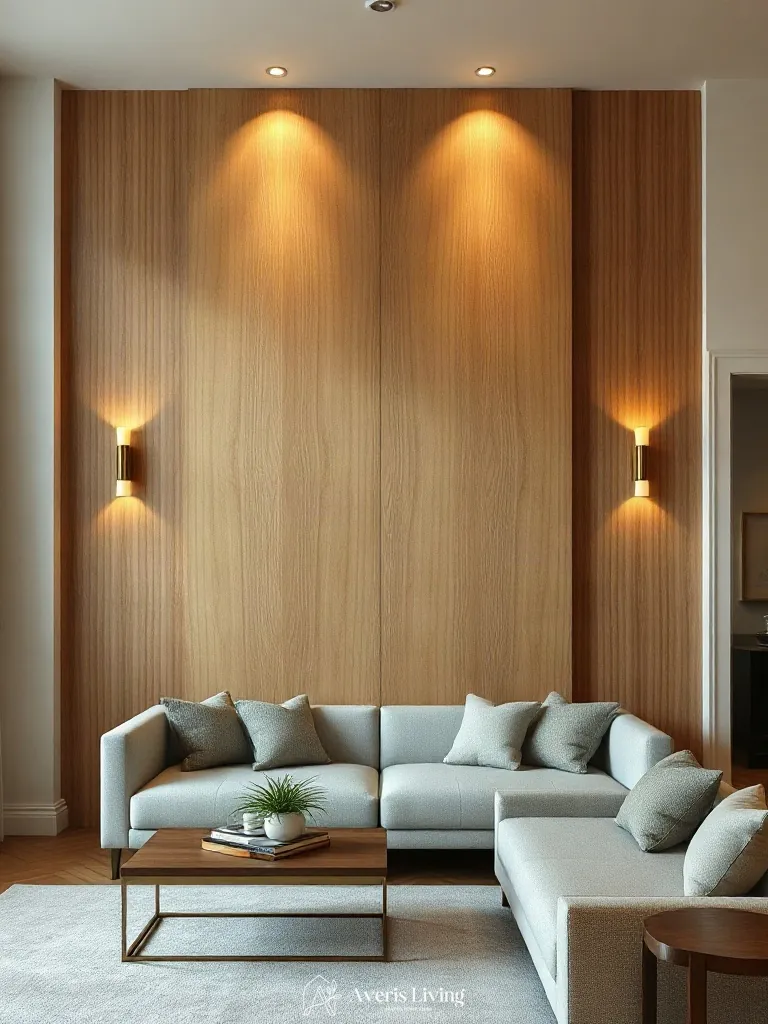
Mounting articulated brass sconces framing a honey-oak diy fluted wood wall feature creates dramatic vertical layering. By positioning fixtures with a narrow 24-degree beam angle at a precise 60-inch height, warm 2700K LED bulbs cast grazing illumination across the concave profiles. This technique accentuates the rhythmic shadows, expanding perceived ceiling height and adding sophisticated warmth to the modern living room.
Install the brass arms securely into wall studs using heavy-duty toggle anchors. Adjust the pivoting heads outward to wash the timber uniformly without creating harsh hotspots. Connect the fixtures to a trailing-edge dimmer switch to seamlessly transition the evening ambiance from task brightness down to a gentle, golden glow.
Recess warm-3000K LED strip lights into ceiling coves above a dark walnut slat wall for a shadow-free ambient wash
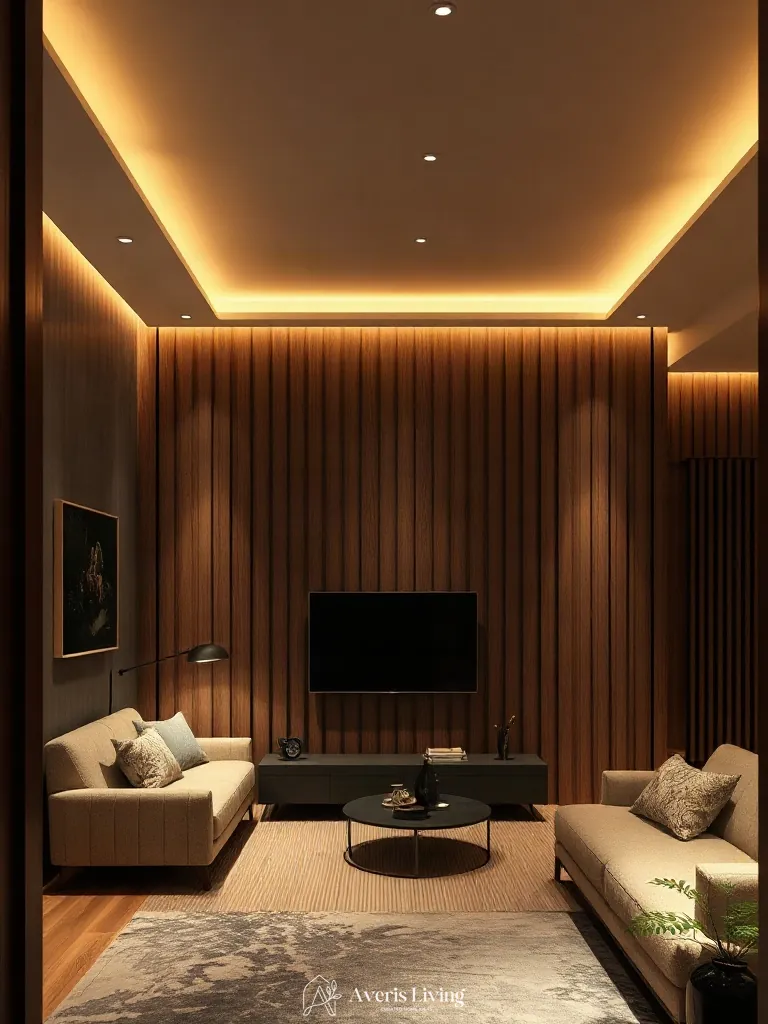
Integrating 3000K LED strip lights within a custom ceiling cove creates a shadow-free ambient wash that elevates any modern living room. This warm color temperature neutralizes the heavy absorption of dark walnut timber, enhancing the tactile rhythm of your diy fluted wood wall feature. The downward beam angle stretches perceived ceiling heights while casting a cinematic glow.
Recess a shallow aluminum extrusion flush into the drywall perimeter, maintaining a two-inch setback from the timber panels. Opt for a frosted diffuser lens with a 120-degree beam angle to completely eliminate diode spotting and ensure a continuous, sophisticated wash.
Hang a single statement rattan pendant thirty inches above the primary seating zone opposite the DIY sluted backdrop
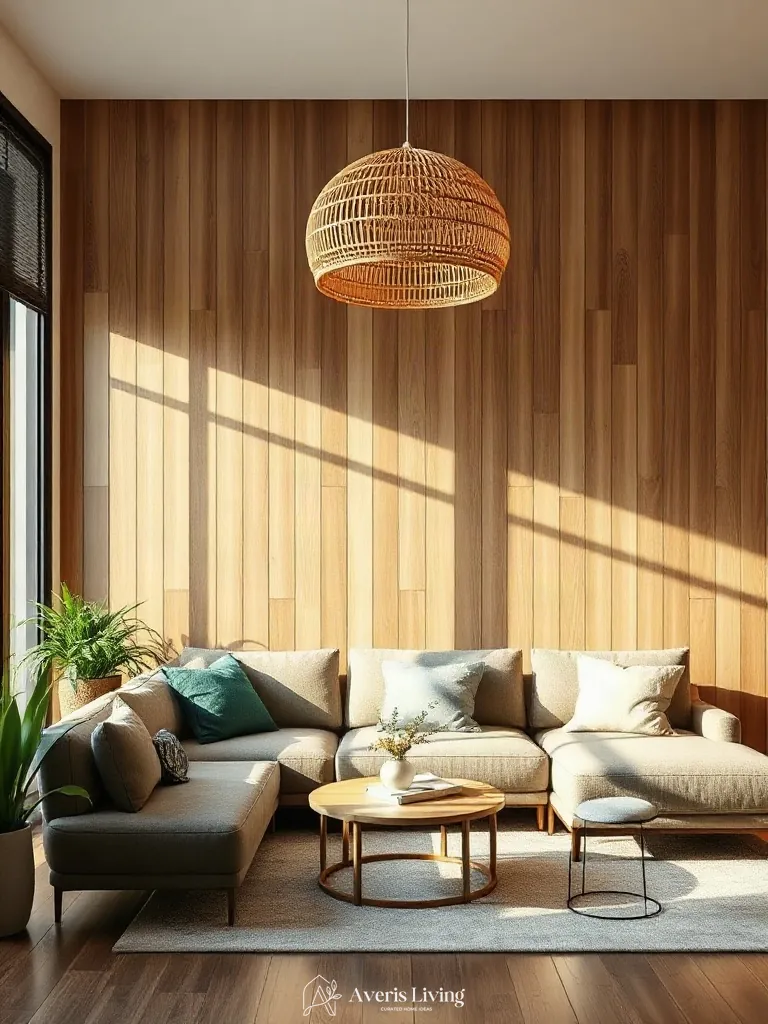
Suspend a grand thirty-six-inch rattan pendant precisely thirty inches above your primary seating zone to create an arresting visual focal point directly opposite the diy fluted wood wall feature. This intentional lighting architecture introduces warm organic textures while casting a focused downward pool of illumination, beautifully softening the room’s hard vertical lines.
Install the fixture using a 2700K warm white LED Edison bulb with a 60-degree beam angle to achieve cozy intimacy. This specific Kelvin temperature enhances the golden wood tones, visually expanding the perceived scale of the living room through layered overhead depth.
Backlight vertical pine fluted panels with hidden LED tape to accentuate the rhythmic shadow lines
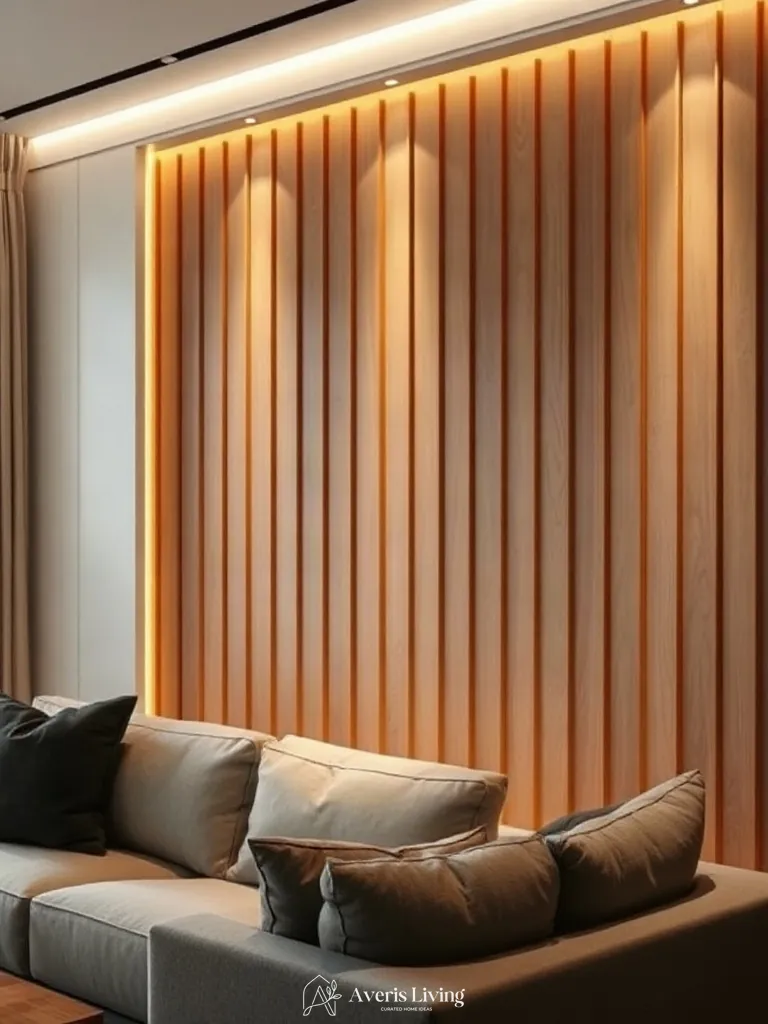
Illuminating a vertical pine diy fluted wood wall feature with hidden LED architecture dramatically expands perceived room scale. By employing warm 3000K LED strips recessed into ceiling coves, you generate a shadow-free ambient wash that accentuates rhythmic relief lines. Narrow 30-degree beam angles graze the timber grain, transforming flat planes into sculptural focal points with rich chiaroscuro depth.
To execute this technique, route a continuous channel behind the upper paneling framing. Install flexible silicone-encased diodes rated at 24 volts to eliminate voltage drop across extended runs. Position the hidden source two inches off the wall surface to achieve optimal light dispersion without harsh hot-spotting.
Position a custom L-shaped modular sofa in warm performance linen against a floor-to-ceiling walnut slat accent wall
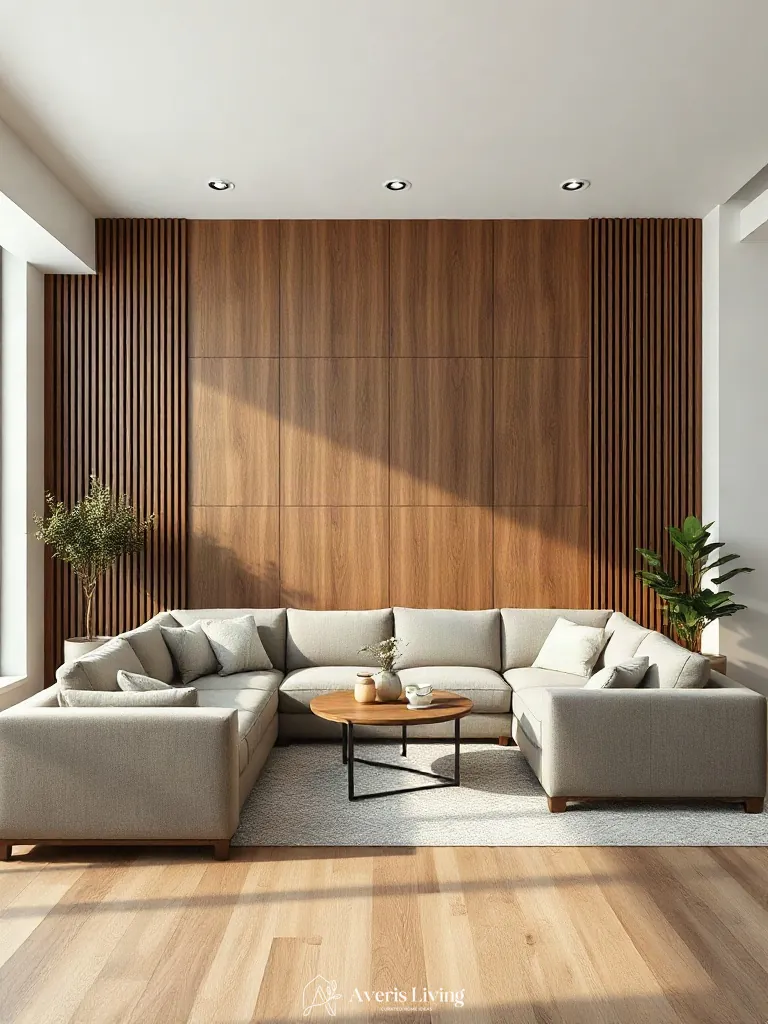
Grounding the expansive living room requires a generously proportioned L-shaped modular sofa upholstered in a warm, stain-resistant performance linen. This low-profile hero piece features deep 40-inch seating depths and concealed block feet that create a floating silhouette. By placing this commanding seating option against a floor-to-ceiling walnut slat accent wall, the tactile contrast between the soft woven textile and rich timber instantly anchors the entire room composition.
To execute this layout, position the primary chaise section at least 18 inches away from the vertical grain to let the diy fluted wood wall feature remain fully visible. Select a sofa with a modular ottoman and continuous feather-blend cushions to maintain a relaxed, high-end editorial aesthetic.
Pair a sculptural travertine pedestal coffee table with curved upholstered chairs in front of a DIY fluted wood backdrop
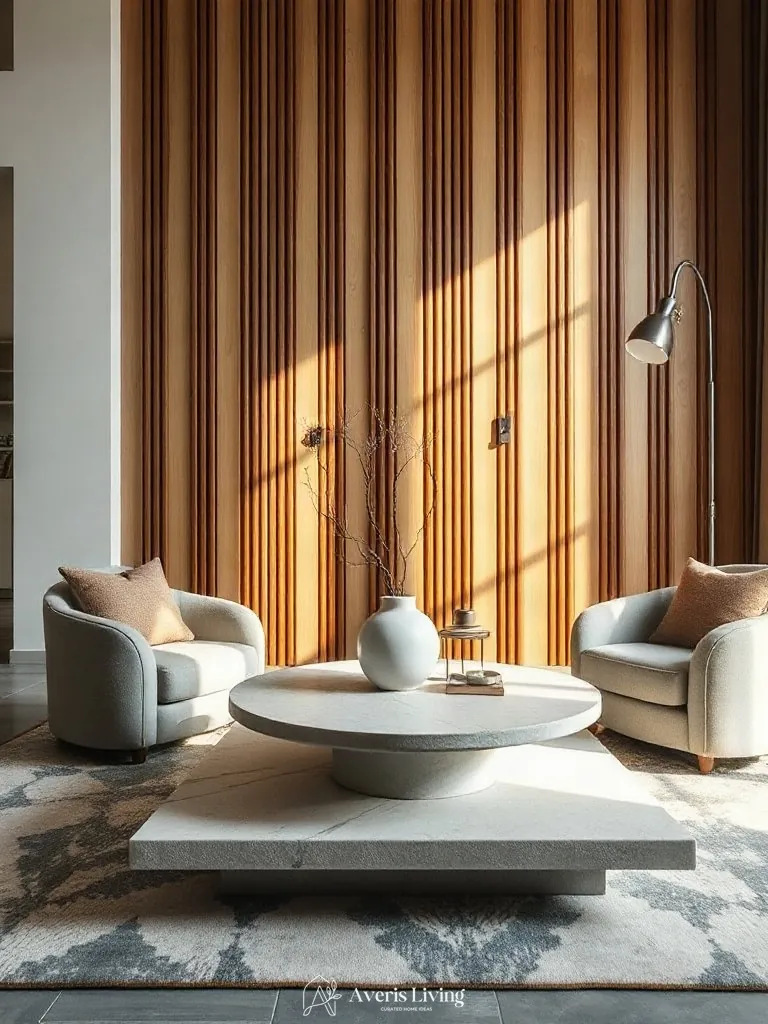
A sculptural travertine pedestal coffee table serves as a heavy, organic counterweight to the linear rhythm of a diy fluted wood wall feature. Paired with low-profile, curved upholstered armchairs wrapped in heavy bouclé, the ensemble creates a harmonious dialogue between jagged architectural lines and soft, inviting silhouettes. The thick stone slab proportions ground the central conversation zone while maintaining visual fluidity across the open layout.
To execute this focal arrangement, position the travertine table exactly eighteen inches away from the primary seating edge to ensure optimal legroom and traffic flow. Select armchairs with concealed recessed wooden legs to maximize the illusion that the curved upholstery is floating effortlessly against the textured timber backdrop.
Feature an oversized barrel-back accent chair in mohair velvet as a secondary focal piece beside a honey-oak sluted divider
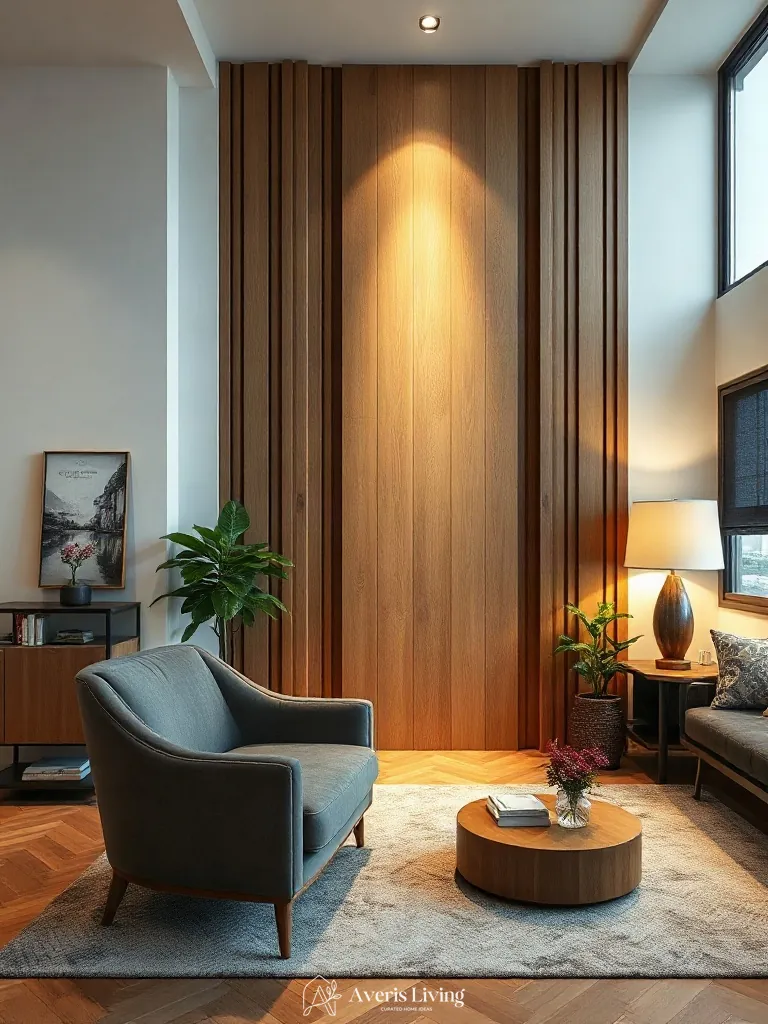
A sweeping barrel-back accent chair upholstered in rich mohair velvet introduces crucial organic curves to balance the linear geometry of a honey-oak slatted divider. Standing at thirty-four inches wide, this generously proportioned hero seating anchors a secondary conversation zone without competing against the primary layout. Substantial tapered brass legs elevate the heavy silhouette, injecting a refined mid-century metallic contrast.
Position the chair at a distinct forty-five-degree angle exactly two feet away from the honey-oak divider to maintain optimal spatial flow. Complete this statement vignette by pairing the seating with a low-profile floor lamp casting warm evening light across the tactile velvet nap.
Anchor the room with a distressed leather chesterfield sofa placed squarely before a dark-stained vertical wood slat feature
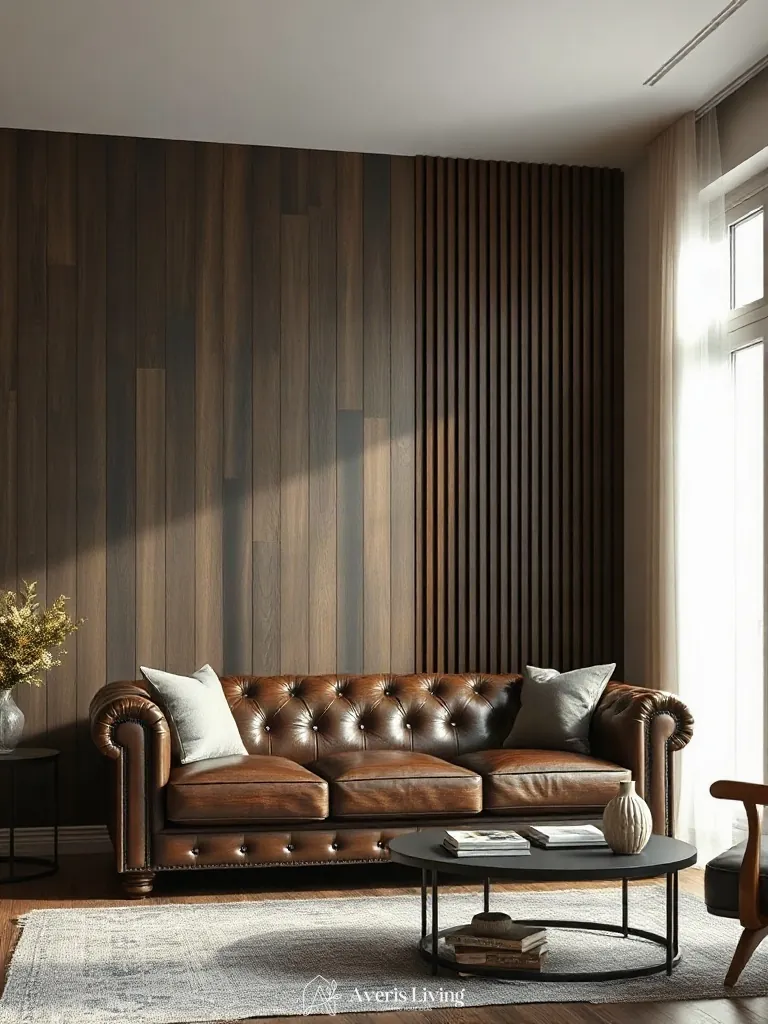
A distressed leather chesterfield sofa commands the living room through deep-button tufting and rolled arms. The rich cognac hide contrasts sharply against a dark-stained diy fluted wood wall feature, establishing the primary seating proportion. At ninety-six inches wide, this low-profile hero piece grounds the verticality of the surrounding architectural slats.
Position the sofa squarely three feet forward from the slatted backdrop to maintain breathing room. Choose an aniline-dyed leather finish showing natural distressing, complemented by tapered espresso wood block feet that bridge the transitional aesthetic.
Hang a gallery wall of unframed linen-mounted botanical prints in mismatched sizes across a honey-oak fluted backdrop
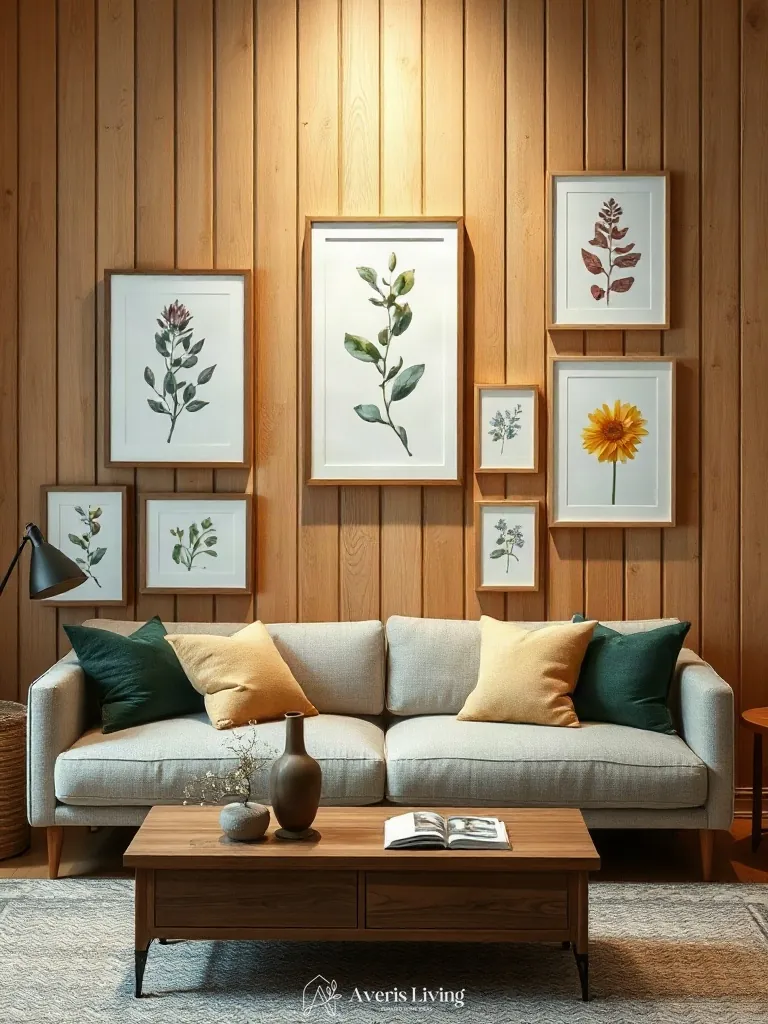
Mounting unframed, linen-mounted botanical prints like delicate maidenhair fern and ginkgo leaves across a honey-oak fluted wood wall feature creates a striking contrast in texture. The smooth, fibrous linen softens the rigid vertical geometry of the slats. By utilizing mismatched rectangular sizes—ranging from 5×7 inches to 16×20 inches—you introduce dynamic scale contrast against the uniform rhythm of the wood.
Maintain exactly two inches of negative space between each print to prevent visual clutter. Secure the lightweight, stiffened linen panels using heavy-duty adhesive velcro strips instead of traditional framing hardware for a clean, floating aesthetic.
Style an oversized terracotta urn with dried pampas grass as the primary landing focal point against a walnut slat wall
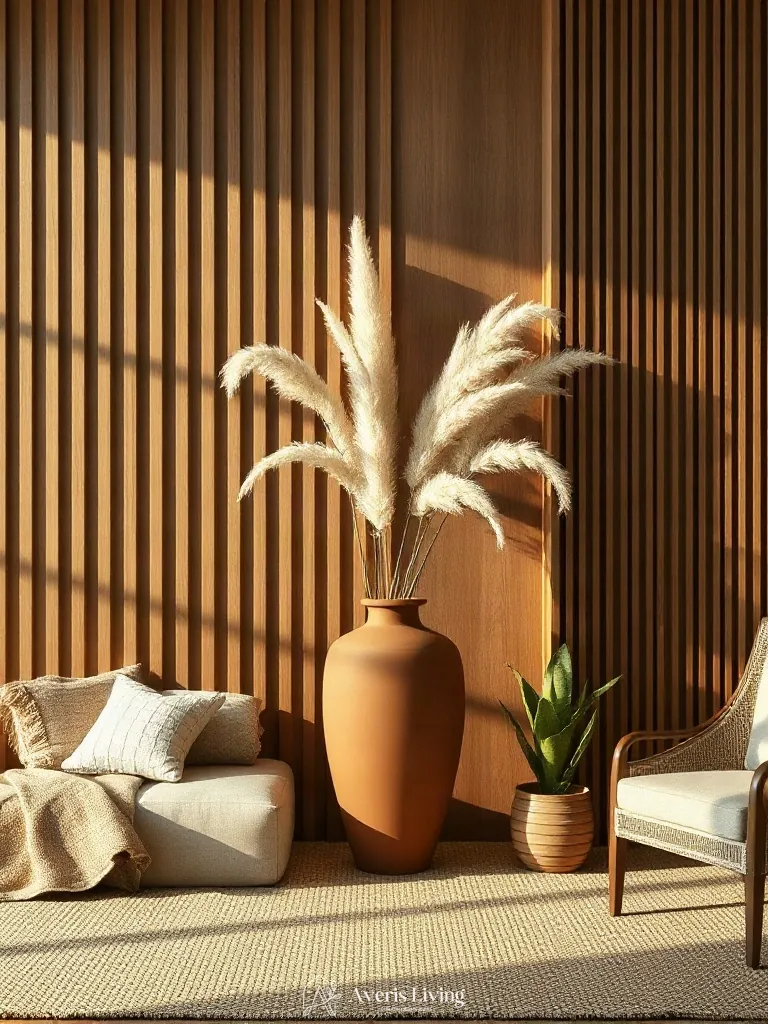
Grounding your living room landing against a rich walnut slat wall requires deliberate scale contrast. An oversized terracotta urn measuring at least thirty inches tall introduces a porous, earth-baked texture that offsets the linear geometry of a diy fluted wood wall feature. Filling this vessel with towering dried pampas grass and trailing pothos vines creates dynamic verticality, playing organic asymmetry against the structured millwork.
Apply the rule of asymmetrical weighting for this corner vignette. Position the terracotta urn slightly off-center from the wall’s midpoint, ensuring the pampas plumes fan outward into negative wall space. Allow the pothos tendrils to cascade down one side of the vessel, breaking the rigid vertical lines of the slats.
Arrange DIY plaster-painted vintage clay jars in a staggered-height trio on a sluted wood floating shelf
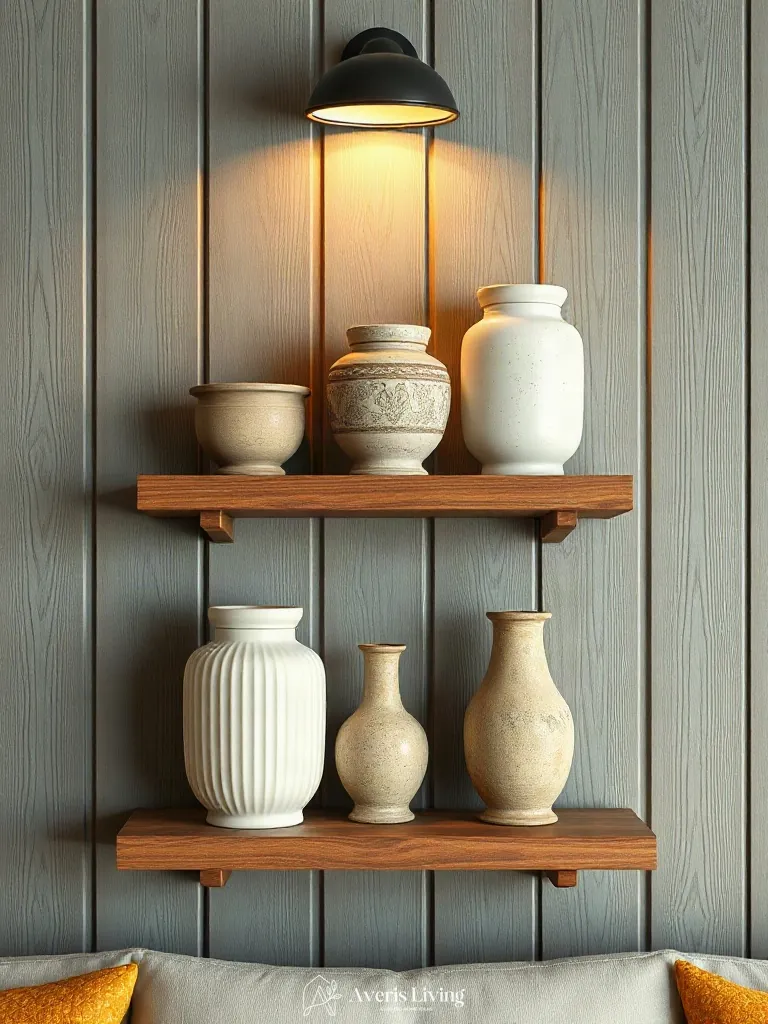
A staggered-height trio of vintage clay jars introduces rustic imperfection against the rhythmic geometry of a diy fluted wood wall feature. Plaster paint adds chalky matte texture, creating compelling scale contrast against smooth linear slats. In the living room, this grouping establishes a focal point under evening lamplight.
Arrange the jars on a 36-inch white oak floating shelf using the rule of odds. Select vessel heights of 8, 12, and 15 inches, leaving at least 4 inches of negative space on either end to let the tactile plaster finishes breathe without cluttering the display.
Layer a vintage Moroccan wool rug over honey-oak hardwood floors directly below a newly installed vertical wood slat feature wall
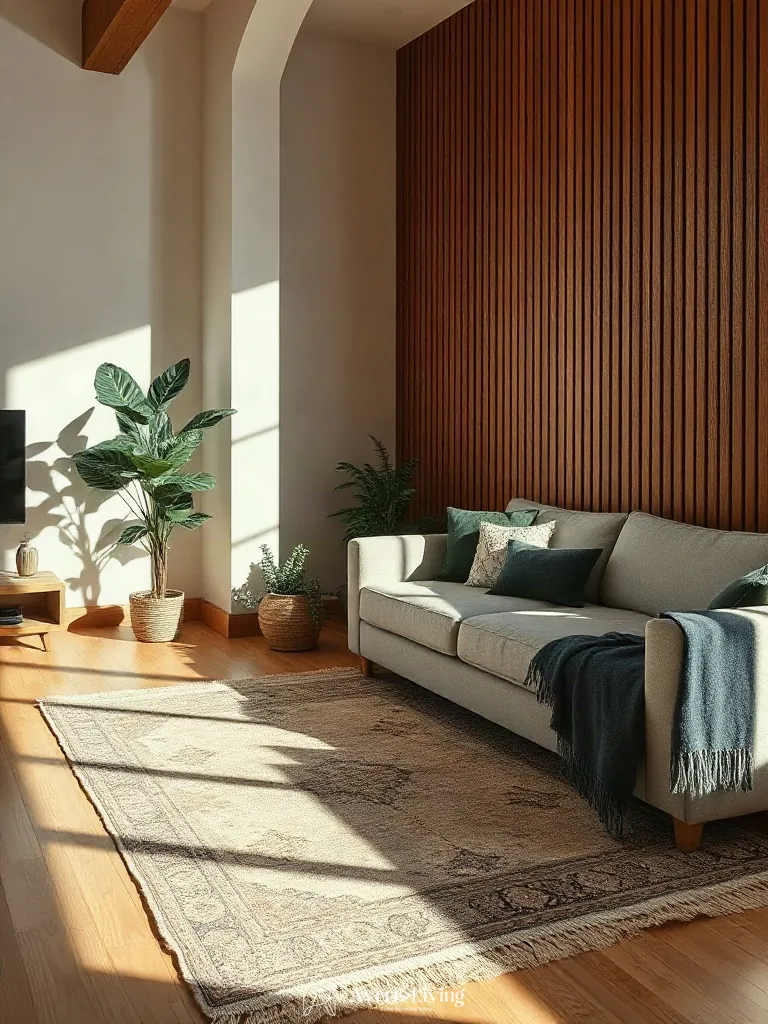
Anchoring your diy fluted wood wall feature with a vintage Moroccan Beni Ourain wool rug creates tactile contrast against honey-oak hardwoods. The thick, cream-colored pile absorbs sound while introducing organic geometry to balance linear slats. Pair this flooring base with a heavy matte-black ceramic vessel holding architectural eucalyptus branches to establish intentional negative space within the living room.
Leave at least eighteen inches of bare honey-oak flooring exposed around the rug perimeter to let the wood grain breathe. Group a trio of amber glass bottles off-center on the floor nearby, maintaining a strict scale contrast against the soaring vertical wall height.
Embracing a diy fluted wood wall feature allows you to infuse your living room with high-end architectural character while staying budget-conscious. Whether you gravitate toward rich walnut stains or warm honey-oak tones, these 25 curated design ideas provide a roadmap for elevating your space.
Save your favorite concepts, gather your tools, and begin crafting a stunning, tactile accent wall that turns your living room into a masterclass in modern interior design.